

Homeowner Knowledge Base
How to report and track snags effectively
The short answer: use one numbered schedule, describe what you can observe, add dated photographs and preserve every response. A clear record helps the developer allocate work, allows you to check repairs and preserves the history if an item becomes disputed. It does not prove the cause or guarantee that every item is the developer’s responsibility.
CheckSure’s Homeowner Knowledge Base draws on practical experience of building, inspecting and resolving defects in new homes. Our aim is to explain what homeowners should reasonably expect, what may require further investigation and what steps they can take next.
Why the quality of the record matters
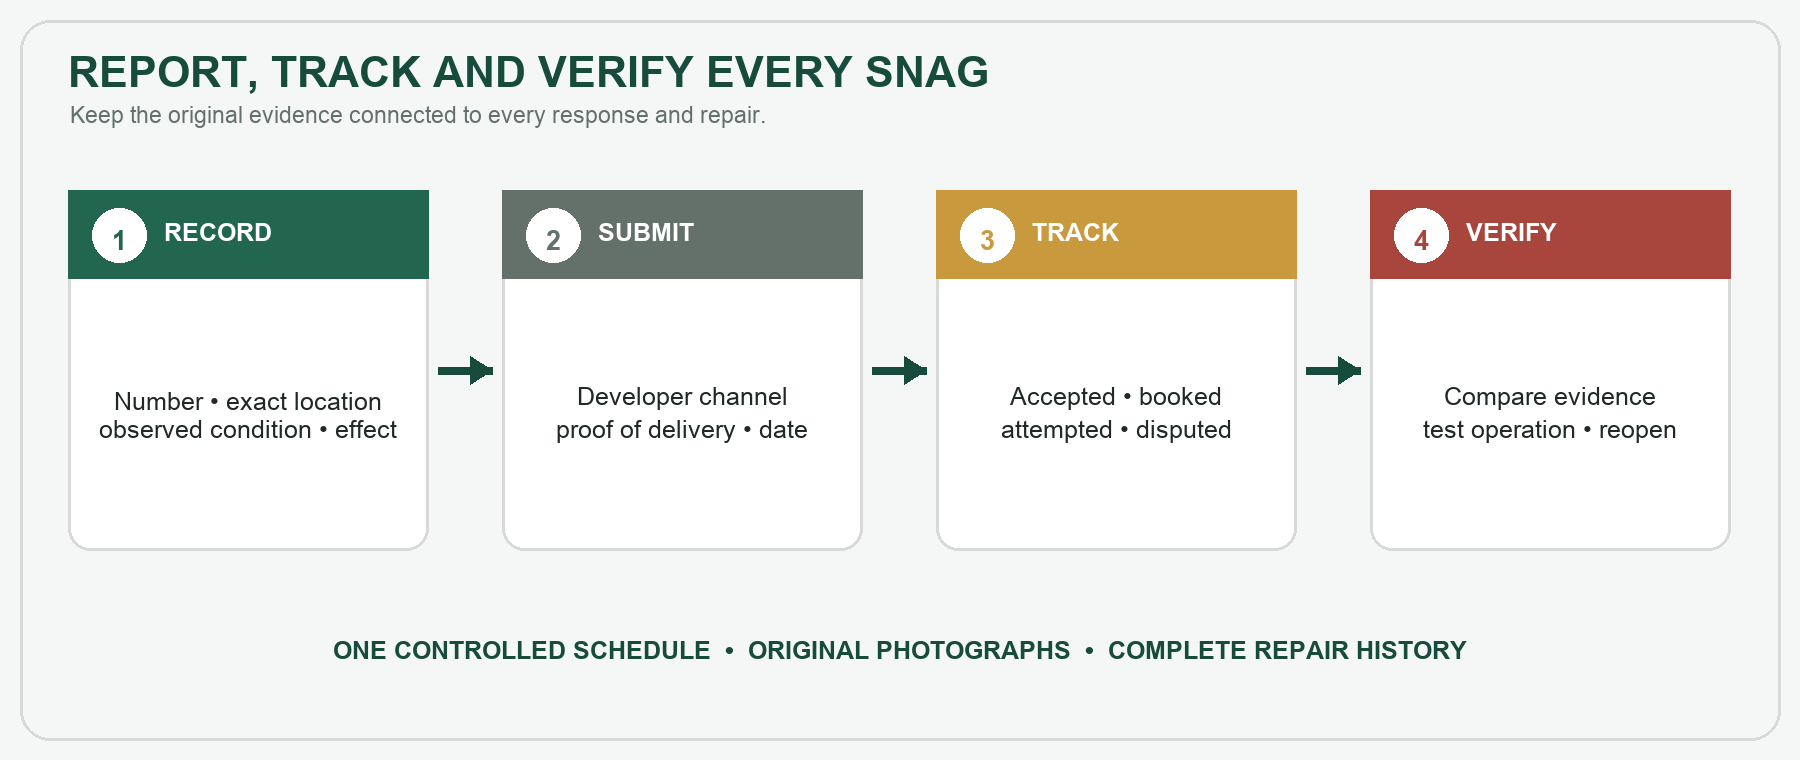
A message such as “the bathroom is poor” is difficult to investigate. A useful entry identifies the room, exact position, observed condition and effect. It separates evidence from diagnosis and gives each party the same reference number. Keep the original schedule intact; later updates should change status, not erase history.
What should each snag record contain?
- A unique item number.
- The room, elevation or external area and a precise location.
- The date first noticed and, where relevant, the conditions at the time.
- A short factual description of what is visible or not operating.
- The practical effect, such as active leakage, failure to latch or a trip concern.
- Clear overview and close-up photographs, with a scale only where it helps.
- The date submitted, acknowledgement, appointments and current status.
Describe the symptom, not an assumed cause
Write “brown staining has appeared on the ceiling below the bathroom” rather than asserting that a particular pipe has failed. A visible symptom may have several causes. Diagnosis may require testing, opening-up or a specialist outside an ordinary snagging inspection.
How should photographs be taken?
Use ordinary, truthful images. Start with an overview showing location, then a closer image showing the issue. Keep the original files and avoid filters or editing that could change appearance. For cosmetic finishes, record the normal viewing conditions as well as any close-up; an extreme angle or artificial raking light can exaggerate a surface.
How should the schedule be managed?
- Submitted — sent through the developer’s stated channel, with proof retained.
- Developer response — record whether the item is accepted, rejected or awaiting a decision.
- Appointment arranged — retain the agreed date, access requirements and proposed work.
- Work reported complete — record what the developer or contractor says was done.
- Customer verified — compare the result with the original observation and evidence.
- Closed — use only after the result has been checked and is satisfactory.
- Reopened — the symptom remains, has returned or the repair caused damage.
Checking completed repairs
Do not close an item simply because a trade attended. Compare the area with the original record, check normal operation where safe, and photograph the finished result. Record new damage, incomplete decoration or a failed functional test as a continuation of the original item or a clearly linked new item.
When should an item be escalated?
Use the emergency route for danger or active damage. For ordinary unresolved items, follow the developer’s formal complaints procedure once informal aftercare is no longer effective. The available complaint route will depend on the home, developer, reservation date, consumer code and warranty scheme.
Key takeaways
- Use one numbered schedule and preserve its history.
- Describe observations and effects without guessing at causes.
- Keep original photographs, messages, appointments and repair evidence.
- Verify repairs before marking an item complete.
Explore further
Explore the CheckSure Homeowner Knowledge Base for related guidance on buying, inspecting and looking after a new home.
Related Knowledge Base articles
- The hidden problems with new-build homes—and how to avoid them
- Getting snags fixed: developer aftercare, complaints and escalation
- End-of-Defects Inspection: what to check before the deadline
- Which snags need urgent attention?
- New-build handover checklist and documents
Sources & References
New Homes Quality Board — After-sales service, complaints and the New Homes Ombudsman: https://www.nhqb.org.uk/the-code/part-3-after-sales-service-complaints-and-the-new-homes-ombudsman/
Independent new-home inspections
Need help with your new home?
If you are approaching completion, have recently moved in or are dealing with unresolved concerns, CheckSure can help you choose the appropriate inspection for your stage.
Important information
The Knowledge Base provides general information for homeowners in the UK. It is not a substitute for advice about an individual property and should not be treated as legal, financial, insurance, structural or other specialist advice. Requirements and warranty terms can vary according to location, construction date, provider, contract and the circumstances of the particular home.
Copyright and permitted use. © 2026 CheckSure Ltd. All rights reserved. Website content may not be reproduced without permission, except as permitted by law. See our Content Use and Copyright Policy.